
+86-159 9860 6917
info@geofantex.com
geofantex@gmail.com
+86-400-8266163-44899
Building a Retaining Wall with Geogrid
Building a retaining wall with geogrid reinforcement involves several steps to ensure the wall is strong, durable, and able to support the soil behind it. Here’s a comprehensive guide:
Materials Needed:
- Retaining wall blocks or stones
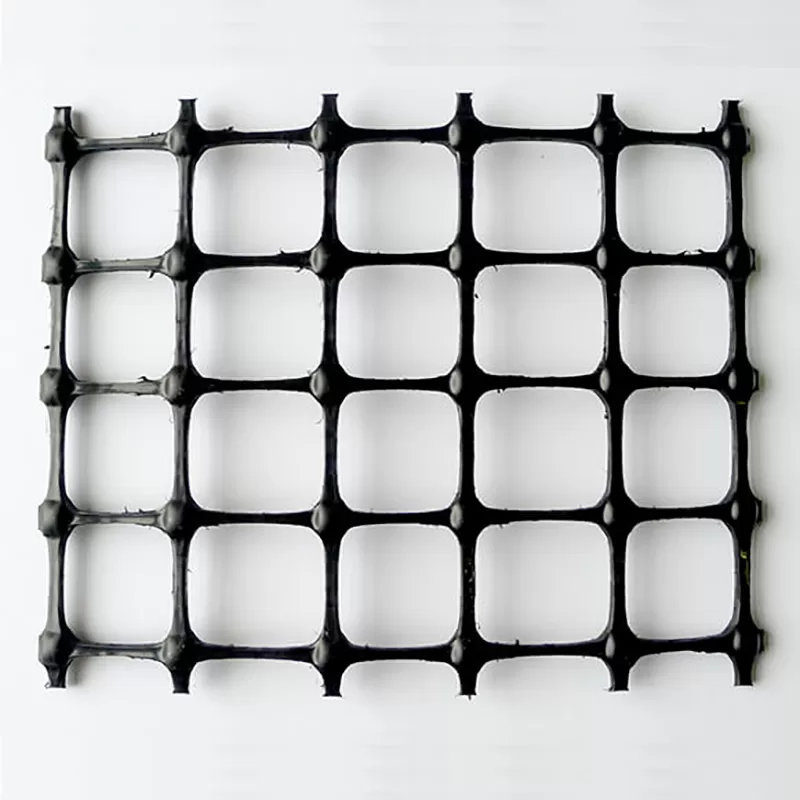
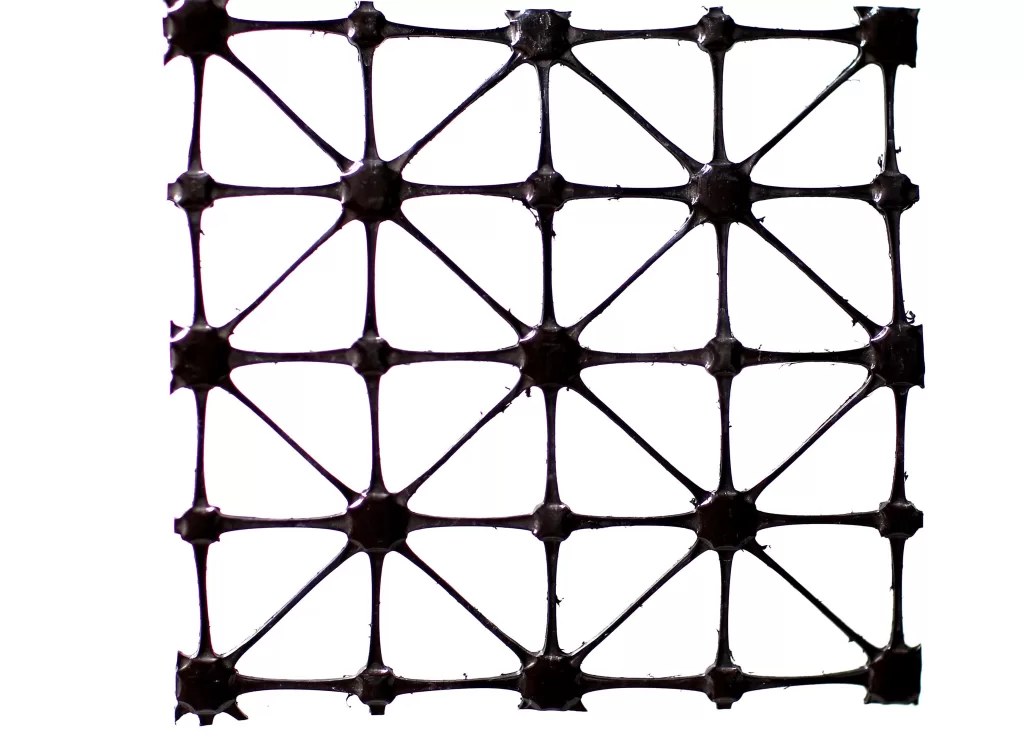
- Geogrid
- Crushed stone or gravel
- Soil (for backfill)
- Shovels, rakes, and other gardening tools
- Level
- Compactor (manual or mechanical)
- Stakes and string (for alignment)
- Landscape fabric (optional for added stability and drainage)
Step-by-Step Guide:
Planning and Design:
- Determine the wall height: The height of your wall will dictate the need for permits and the amount of reinforcement required.
- Design the wall: Consider the slope, drainage, and the type of soil.
Excavation and Base Preparation:
- Excavate the area: Dig a trench where the wall will be built. The trench depth should be about 1/8th the height of the wall, plus a few inches for the base material.
- Prepare the base: Fill the trench with 6-12 inches of crushed stone or gravel and compact it thoroughly. This forms a stable base for the first course of blocks.
Laying the First Course:
- Set the first course: Place the first row of retaining wall blocks on the prepared base. Use a level to ensure they are perfectly level and aligned.
- Backfill and compact: Fill behind the first course with gravel and compact it. This provides additional stability.
Installing Geogrid:
- Lay the geogrid: After the first course, lay the geogrid on top of the blocks, extending it into the backfill area. The length of the geogrid extending into the soil should be at least as long as the wall height.
- Secure the geogrid: Ensure the geogrid is taut and not bunched up. The geogrid should be placed every third course of blocks (or as specified by the manufacturer or engineer).
Building Subsequent Courses:
- Add more courses: Continue laying additional courses of blocks, ensuring each course is level. Stagger the joints of each row to add strength.
- Add geogrid as needed: For every third course, lay another layer of geogrid, extending it into the backfill area.
Backfilling and Compaction:
- Backfill: As you build the wall, backfill with gravel behind each course of blocks and compact it. This helps in proper drainage and stability.
- Compaction: Compact the backfill material every 8-12 inches. This ensures the wall remains stable and prevents settling.
Finishing the Wall:
- Top the wall: Once the desired height is reached, place the top or capstones. These are typically glued down with a concrete adhesive for added security.
- Backfill the final layer: Backfill the top of the wall with soil and compact it. Ensure proper drainage by grading the soil away from the wall.
Final Touches:
- Install drainage features: Depending on the wall height and design, install drainage pipes or weep holes to prevent water buildup behind the wall.
- Landscape: Add landscaping fabric, plants, or other decorative elements to complete the look of your retaining wall.
Tips for Success:
- Check for permits: Depending on the wall height and local regulations, you might need a permit or a professional engineer’s input.
- Ensure proper drainage: Water buildup behind the wall can lead to failure. Always include drainage solutions in your design.
- Regular maintenance: Inspect the wall periodically for any signs of movement or settling and address issues promptly.
Building a retaining wall with Geogrid requires careful planning and attention to detail, but following these steps will help you create a strong and durable structure.
Types of Small Retaining Walls
Gravity Retaining Walls
- Materials: Concrete, stone, or brick.
- Construction Methods: These walls rely on their mass to resist the pressure from the soil. They are built with a thicker base that tapers towards the top.
- Benefits: Simple to construct, durable, and effective for small-scale applications.
Cantilever Retaining Walls
- Materials: Reinforced concrete or masonry.
- Construction Methods: These walls use a cantilevered structure, with a slab foundation and a vertical stem. The weight of the soil above the base slab helps stabilize the wall.
- Benefits: Efficient use of materials, suitable for moderate heights, and provides good stability.
Sheet Piling Retaining Walls
- Materials: Steel, vinyl, or wood.
- Construction Methods: Interlocking sheets are driven into the ground to form a continuous barrier. The sheets are typically reinforced to handle the pressure.
- Benefits: Ideal for tight spaces, quick installation, and useful for waterfront applications.
Anchored Retaining Walls
- Materials: Concrete or steel.
- Construction Methods: These walls use anchors or tiebacks driven deep into the soil and connected to the wall. They provide additional support and stability.
- Benefits: High strength, suitable for taller walls, and effective in loose soil conditions.
Gabion Retaining Walls
- Materials: Wire mesh cages filled with rocks or stones.
- Construction Methods: Gabions are stacked to form the wall, with the weight of the stones providing stability.
- Benefits: Environmentally friendly, good drainage, and flexible to adjust to ground movements.
Segmental Retaining Walls
- Materials: Modular concrete blocks.
- Construction Methods: The blocks interlock without the need for mortar, creating a flexible and durable wall. Geogrids may be used for additional reinforcement.
- Benefits: Easy to install, aesthetically pleasing, and adaptable to various designs and heights.
Each type of small retaining wall has unique characteristics and benefits. Gravity walls are simple and durable, cantilever walls make efficient use of materials, sheet piling walls are quick to install, anchored walls provide high strength, gabion walls are environmentally friendly, and segmental walls offer flexibility and ease of installation.
When to Use Geogrid in Retaining Walls
Slope and Wall Height Considerations:
- Tall Retaining Walls: Geogrid is essential for retaining walls over 4 feet tall to ensure stability and prevent failure.
- Steep Slopes: Use geogrid on steep slopes where soil pressure against the wall is high to distribute loads and enhance wall integrity.
Soil Type and Conditions:
- Poor Soil Conditions: In soils with low bearing capacity or high moisture content, geogrid helps improve soil strength and reduce erosion.
- Sandy or Loose Soils: Geogrid stabilizes loose soils, providing additional support to prevent shifting and settlement.
Design and Load Requirements:
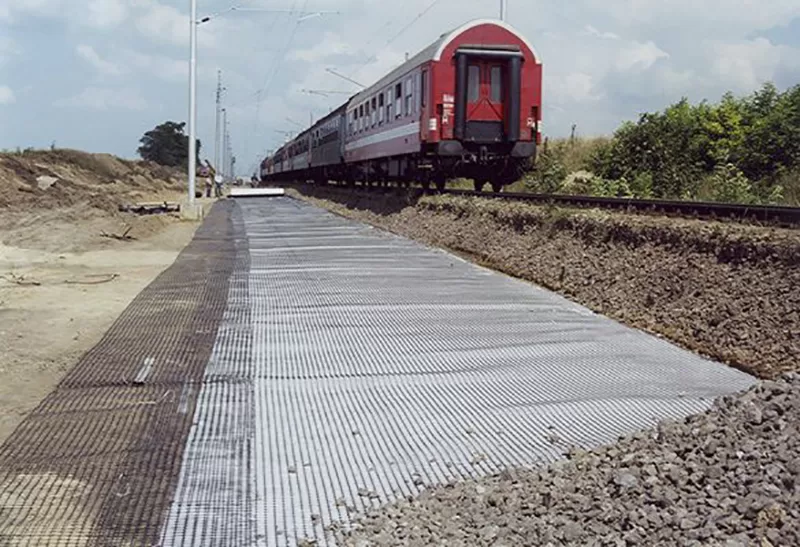
- High-Load Applications: For walls supporting heavy loads (e.g., parking lots, roadways), geogrid enhances load distribution and wall stability.
- Structural Design Needs: In engineered designs requiring additional reinforcement, geogrid offers increased tensile strength and durability.
Environmental and Safety Factors:
- Seismic Areas: In earthquake-prone regions, geogrid helps absorb seismic forces, reducing the risk of wall failure.
- Drainage and Erosion Control: Geogrid aids in managing water flow and erosion control, especially in areas with significant rainfall.
Cost and Maintenance Considerations:
- Long-Term Durability: Incorporating geogrid can extend the lifespan of the retaining wall, making it a cost-effective solution over time.
- Maintenance Reduction: Geogrid minimizes maintenance needs by preventing soil movement and wall displacement.
If You Do Not Need an Engineer
Situations When You Do Not Need an Engineer:
- Simple DIY Home Projects: Tasks like painting, minor repairs, or installing shelves can often be done without professional help.
- Basic Landscaping: Planting flowers, mowing the lawn, and other straightforward gardening activities generally do not require an engineer.
- Routine Maintenance: Regular maintenance tasks such as changing air filters, replacing light bulbs, or cleaning gutters can typically be handled by homeowners.
- Pre-Assembled Furniture: Assembling pre-made furniture from stores like IKEA often comes with clear instructions that don’t necessitate engineering expertise.
- Standard Vehicle Maintenance: Basic car maintenance tasks like oil changes, tire rotations, or replacing windshield wipers can usually be done by the vehicle owner or a mechanic.
- Tech Setup: Setting up electronics such as computers, televisions, or smart devices often only requires following the provided instructions.
Drainage Considerations
To ensure proper drainage in a construction project and prevent flooding or erosion, consider the following factors:
Site Analysis:
- Topography: Understand the slope and natural drainage patterns of the site.
- Soil Type: Identify soil permeability to determine water absorption capacity.
- Vegetation: Assess existing vegetation that can impact drainage and soil stability.
Design Considerations:
- Drainage System Design: Plan for an effective drainage system including surface drains, subsurface drains, and gutters.
- Grading: Ensure proper grading to direct water away from structures and towards designated drainage areas.
- Impervious Surfaces: Minimize impervious surfaces to reduce runoff and promote infiltration.
Regulatory Compliance:
- Local Regulations: Adhere to local building codes and environmental regulations regarding stormwater management.
- Permits: Obtain necessary permits for drainage system installation.
Environmental Impact:
- Water Quality: Implement measures to filter runoff and reduce pollutants.
- Erosion Control: Use erosion control techniques such as silt fences, retaining walls, and riprap.
Maintenance Plan:
- Regular Inspection: Schedule regular inspections of drainage systems to identify and address any issues.
- Debris Removal: Keep drainage channels clear of debris to prevent blockages.
- Repairs: Promptly repair any damaged components of the drainage system.
By considering these factors, you can ensure effective drainage, prevent flooding, and maintain site stability.
Installing Geogrid in the Retaining Wall
Materials Needed:
- Geogrid rolls
- Retaining wall blocks or stones
- Gravel or crushed stone for backfill
- Shovel and rake
- Tamper or plate compactor
- Level
- Measuring tape
- Utility knife or scissors
Installation Steps:
- Site Preparation: Excavate the area where the retaining wall will be built, ensuring a level base. Install a base layer of gravel or crushed stone and compact it using a tamper or plate compactor.
- First Course of Blocks: Place the first row of retaining wall blocks on the prepared base, ensuring they are level and properly aligned. Use a level to check each block and adjust as necessary.
- Installing the Geogrid: Roll out the geogrid perpendicular to the wall, ensuring it extends into the backfill area. Cut the geogrid to the required length using a utility knife or scissors. Place the geogrid on top of the first course of blocks, making sure it extends over the front edge of the blocks.
- Securing the Geogrid: MLay the second course of blocks on top of the geogrid, ensuring the geogrid is sandwiched between the first and second courses. Pull the geogrid taut and secure it by placing soil or backfill material over it.
- Backfilling: Add gravel or crushed stone backfill behind the retaining wall, compacting it in layers to ensure stability. Continue to add and compact backfill until it reaches the top of the geogrid layer.
- Building Additional Courses: Repeat the process of laying additional courses of blocks and geogrid layers as needed, depending on the height of the retaining wall. Ensure each layer of blocks is level and aligned with the previous ones.
- Final Steps: Once the retaining wall reaches the desired height, finish by placing the top course of blocks or capstones. Ensure the final backfill is properly compacted and graded away from the wall to prevent water accumulation.
Important Considerations:
- Geogrid Placement: Ensure the geogrid is placed at the correct intervals and extends far enough into the backfill area for effective reinforcement.
- Compaction: Properly compact the backfill material in layers to avoid settlement and ensure stability.
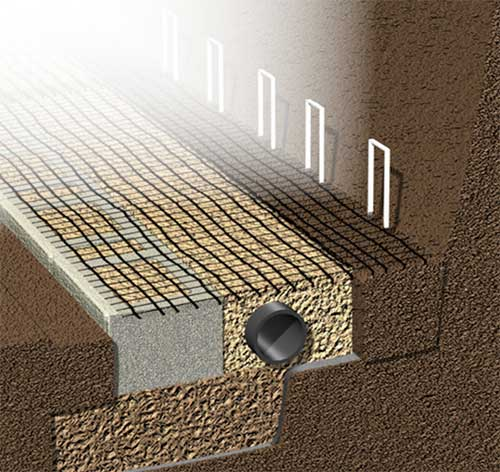
- Drainage: Include proper drainage measures, such as perforated drainage pipes and gravel, to prevent water buildup behind the wall.
- Alignment: Regularly check the alignment and level of the blocks to maintain a straight and stable retaining wall.
Get Free Sample
We’ll respond as soon as possible(within 12 hours)